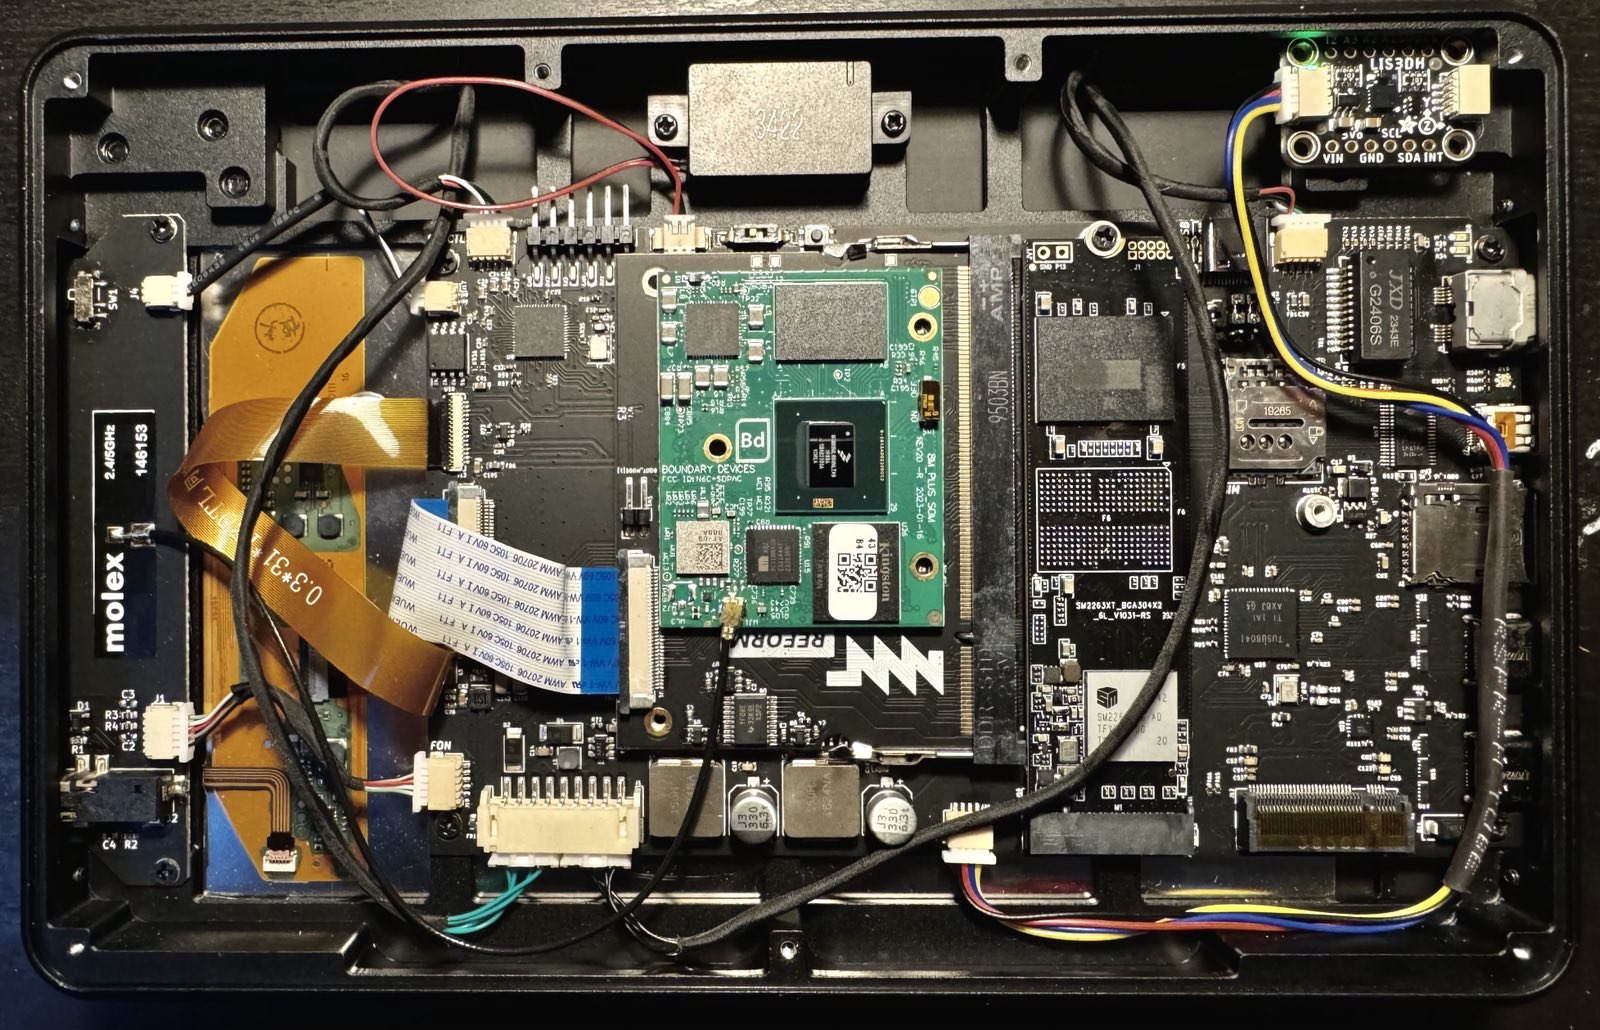
I have an MNT Pocket Reform which I’ve already opened up several times for various purposes (adding extra thermal pads to improve wifi reception, mucking about with alternative aerials, unbricking my system controller from bad firmware flashes). I’ve changed the keyboard layout and tested firmware improvements for the system controller (hence the aformentioned bricking) and even did some of the early work on packaging up the offline version of the manual. In a couple of months I’ll have it open to replace the SoM with an RK3855, at which point it’ll be my MNT Pocket Rocket.
As you can imagine, the machine is living up to the dream for me.
Today I’ve had it open for what I feel is the first innovative hack (albeit an incomplete and fairly rudimentary one), which is to add lid-closed detection by way of 2 Adafruit LIS3DH triple axis accelerometer modules.
The Pocket has a qwiic connector on the motherboard that allows you to connect (and daisy-chain) i2c peripherals to the RP2040, and there was some talk on the forums of wanting to be able to do closed lid detection and this struck me as the easy way of doing it if you’re the mechanical engineering equivalent of my dog trying to open a door that’s already slightly ajar - too stupid. The other advantage of this approach is that instead of just having a single purpose switch, you can subsequently use the sensors for detecting rotation and re-orienting the screen (for instance if you want to read content off of the pocket as if it’s a book - which I do want to do!) or just ridiculous bullshit like shaking it to turn it on (possible due to the fact it connects to the sysctl and not the SoM). Allegedly the sensors support a double-tap gesture too which might be fun to play around with in the future.
Anyway…
The basic concept here is that if you have 2 accelerometers, one in the top half and one in the bottom and they’re in more or less the same orientation in relation to their respective halves, when they both read roughly the same values then you know that they’re parallel to each other and thus the lid is shut.
I’ll pony up here and admit that I’ve not actually done that yet because it looks (and I’ve been too lazy this evening to verify) that there’s not really enough space in the hinges to run another cable, and certainly not without having to crimp my own qwiic connector which ew no. I’ve basically just done the PoC in the top half, so I can detect when the lid is closed and it’s on a flat surface.

After a while mucking about establishing which part of the machine the qwiic
was connected to (reading comprehension isn’t my strong suit when I’m trying to
skip to the end; this is totally in the manual), I jumped into the system
controller code and immediately found the unused i2c_scan function which I
dilligently added in just before the main loop as this enumerates all i2c
devices and prints them out on a pretty little 2D table! I immediately bricked
my sysctl (again) because it turns out I never initialised the tinyusb
dependency for the firmware, so after rescuing that I decided to give up on
being an idiot who can’t read and got it working properly.
The system controller helpfully has its USB UART connected such that you can
just sudo tio /dev/ttyACM0 and I was greeted with (amongst other output):
I2C Scan
   0  1  2  3  4  5  6  7  8  9  A  B  C  D  E  F
00 .  .  .  .  .  .  .  .  .  .  .  @  .  .  .  .
10 .  .  .  .  .  .  .  .  T  .  .  .  .  .  .  .
20 .  .  @  .  .  .  .  .  .  .  .  .  .  .  .  .
30 .  .  .  .  .  .  @  .  .  .  .  .  .  .  .  .
40 .  .  .  .  .  .  .  .  .  .  .  .  .  .  .  .
50 .  .  .  .  .  .  .  .  .  .  .  .  @  .  .  .
60 .  .  .  .  .  .  .  .  .  .  .  .  .  .  .  .
70 .  .  .  .  .  .  .  .  .  .  .  .  .  .  .  .
… well that’s not technically true, the T was an @ but I’ve marked it
here to show the address that was not present when I unplugged the module. This
gave me the address that is, in fact, clearly written on the datasheet. I only
learn the hard way though. Each module has a couple of pads that you can bridge
to modify 1 bit of the address so that you can safely daisy-chain 2 of them and
still address them on the same bus.
So, with the device enumerated I went on to try to find code examples for the RP2040 and what do you know, there was a code example for this peripheral on the upstream repos for the pico. This is part of the genius of using the RP2040 as the system controller - it’s absolutely ubiquitous in the hobbyist scene so there are plenty of libraries, examples and prior art out there.
I chopped the various bits of example code into sysctl.c in the sysctl’s
firmware and after a broken build I fixed the i2c’s pin numbers
(thanks schematic!), putting the read and print functions at the
beginning of the main loop, built and flashed and it started spamming the
accelerometer readings!
I’ve updated the code to have its own counter so it’s a little more… sedate now, giving a reading once every couple of seconds:
# [accel1]: 0.024g,0.924g,-0.384g
With that done, I needed to get the readings from the sysctl onto the host.
Like I say, we have /dev/ttyACM0 for that, but using this gains exclusive
control over it. I’m under the impression that you can either use ptys or some
ioctl on the tty([^1]), but I happened to see in the manpage for tio that it
supports a -S option which additionally listens on a socket. This is a nice
touch as far as I’m concerned because it means that we’ll be able to put
together a systemd socket-activated unit for multiplexing out access for any
additonal i2c peripheral we might want to add when we get round to it.
So with that problem (in theory) solved, I’m keen to skip to the end because proof-of-concept or GTFO. Here, see the dirty shit I bestow on the world every time I do a PoC (split over multiple lines for readability - I don’t even do that I am such a trash goblin):
sudo socat - UNIX-CONNECT:$HOME/sysctl.sock \
| stdbuf -o0 awk -F, '/accel1/ { print substr($2, 1, length($2)-1) }' \
| while read n; do \
  [ $(echo "$n < -0.1" | bc -l) -eq 1 ] && echo open || echo closed; \
done
Which duly tells us when the lid is angled a sufficiently small deviation from horizontal (or I suppose swung around or something). This particular invocation will only work if you place the module in the same orientation as mine.
I’ve now expanded this a little to:
sudo socat - UNIX-CONNECT:$HOME/sysctl.sock \
| stdbuf -o0 awk -F, '/accel1/ { print substr($2, 1, length($2)-1) }' \
| while read n; do \
  [ $(echo "$n < -0.1" | bc -l) -eq 1 ] \
    && (echo open && swaymsg "output * dpms on") \
    || (echo "closed" && swaymsg "output * dpms off"); \
done
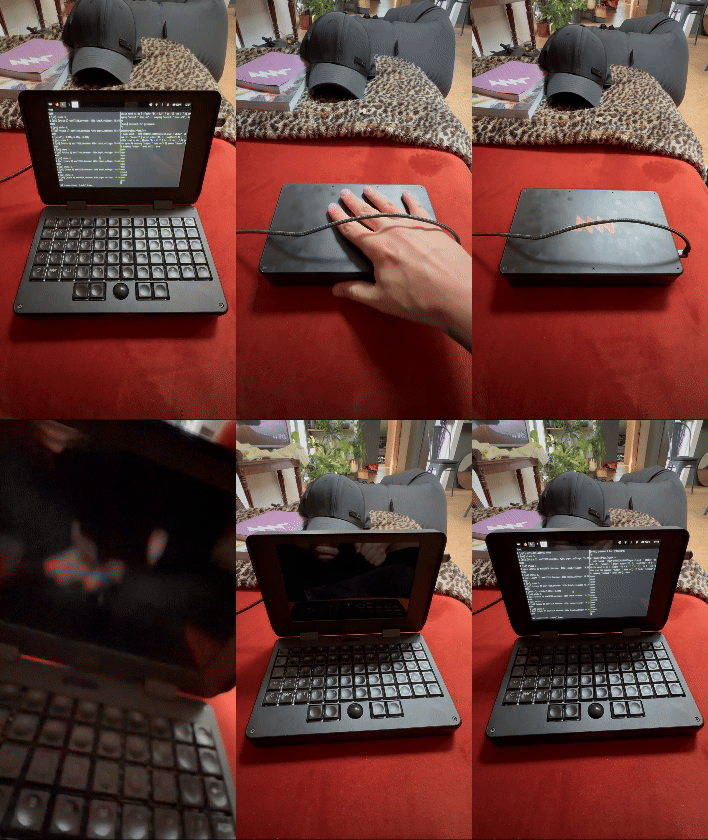
Which will dutifully turn my display off and on again as in this shitty gif (the delay is long because I had the readout frequency set too low):

There’s a better quality version of the video on imgur should you care :)
So, next steps:
minute (Lukas Hartmann)In no particular order.
Anyway, my work-in-progress branch for this is here and the commit at
the time of writing is f9bfefaa662b98dae961ef7f9f72f352ce655612 - if you want
to follow in my footsteps I would very strongly advise you to be familiar
with manually flashing the sysctl from another machine using the internal USB-C
port and to not place any faith in any C I’ve been near.
([^1]: Okay so I looked in to this and it appears that tio is setting the ioctls for exclusive control whereas socat won’t do this for you automagically and if you use 2 different socat instances on the same device you get half of the output on each… So I’m sticking with my tio-with-a-socket option for now.)